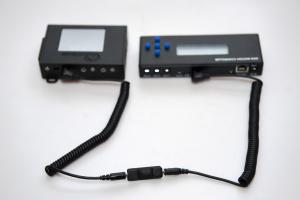
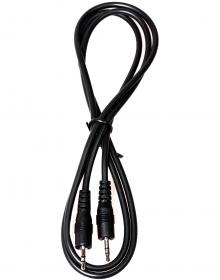
 The RamperPro can trigger motion controllers like the MX2 and MX3 from Dynamic Perception or the eMotimo TB3. These motion control devices suspect an external switch that notifies them to move their motors.
Door andre op vr, 01/10/2014 - 11:59
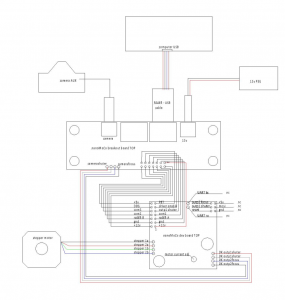
 We sometimes have customers who ask us how to connect our nanoMoCo break-out-board to the nanoMoCo stepper motor controller. One of our customers was so friendly to draw it all out on this image. Please use this schematic if you need any help with wiring the two boards together.
Classic ramping solutions worked by using bulb ramping. The camera is set to bulb and the bulb time is accurately controlled by the time lapse controller. This gives a limited use because you cannot use fast shutter speeds or bulb times faster than approximately 0.3 seconds. Classic bulb ramping cannot be done with a Nikon because you cannot achieve any desired bulb speeds because Nikon uses discrete steps in bulb.
Here the RamperPro steps in. You can use any desired shutter speed or any desired bulb speed to create ramping sequences. The camera is automatically controlled via USB by the controller. That makes it possible to automatically shift the ISO during your shoot. The RamperPro can therefore easily ramp over 20 stops from bright day light to stars. We like to talk about exposure ramping and not about bulb ramping because you are not limited to bulb mode when you use the RamperPro.
Door andre op vr, 11/01/2013 - 12:05
The history of the ElysiaVisuals RamperPro time lapse controller started in 2011. The general consensus at that time was that it is not possible to make good sunset time lapse movie with a Nikon camera. These movies are made by ramping the exposure time of the camera. Its getting darker but the exposure is made longer in small steps which results day to night transitions. The same is true the other way around for sun rises. Classic ramping solutions worked by using bulb ramping. The camera is set to bulb and the bulb time is accurately controlled by the time lapse controller. This gives a limited use because you cannot use fast shutter speeds or bulb times faster than approximately 0.3 seconds. Classic bulb ramping cannot be done with a Nikon because you cannot achieve any desired bulb speeds because Nikon uses discrete steps in bulb.
Here the RamperPro steps in. You can use any desired shutter speed or any desired bulb speed to create ramping sequences. The camera is automatically controlled via USB by the controller. That makes it possible to automatically shift the ISO during your shoot. The RamperPro can therefore easily ramp over 20 stops from bright day light to stars. We like to talk about exposure ramping and not about bulb ramping because you are not limited to bulb mode when you use the RamperPro.
Door andre op wo, 10/16/2013 - 21:53
De toekomst voor product fotografie, uw producten van alle kanten bekijken!
Bij online aankopen wil een klant precies weten wat hij koopt. Als hij het product van alle kanten kan bekijken, blijft er weinig te wensen over! Met de MODE360° 360 graden productfotografie oplossingen kunt u dit in slechts 3 stappen voordelig, snel en effectief aanbieden.
Door andre op di, 09/17/2013 - 03:30
Door andre op zo, 09/08/2013 - 03:13
We are using Adobe Lightroom a lot to manage our images and time lapse sequences. We also use XMP files extensively. These are small files that hold processing information like exposure corrections or white balance corrections. In fact you can use XMP files to store any image processing action that you can perform within Adobe Lightroom and many other Adobe products. This makes transporting your image modifications very easy.
Door andre op zo, 09/08/2013 - 02:59
One big advantage of the eMotimo TB3 black pan and tilt head is its integration with Dragon Frame. Dragon Frame can be used to accomplish complex, but accurate moves by defining key frames on your axis. This was always easy to setup, but the latest 3.5 release really makes life easy. The eMotimo axis are now supported out of the box by Dragon Frame. No more guess work about the optimal settings when you define an axis in Dragon Frame.
Door andre op ma, 07/22/2013 - 23:58
eMotimo TB3 quick, basic setup
Door andre op ma, 07/22/2013 - 23:57
eMotimo TB3 and Dynamic Perceptions Stage One
3rd-axis: choosing the right motor
Pagina's
