Fly by Wire - a Nikon exposure ramping test

I gave an elaborate explanation about timelaps exposure ramping in my last blog called Bulb ramping with a Nikon dSLR - The technical story. I am very interested in exposure ramping timelapse photography. These are movies where you for example see a sunset while the exposure of the movie stays more or less the same. My previous blog describes a solution for a problem that Nikon camera's have when you use them for this complex technique. I now have developed a device that can be used to automatically exposure ramp timelapse movies. The ISO of the camera, shutter speed and in the very near future the aperture of the camera will be automatically set by my timelapse controller.
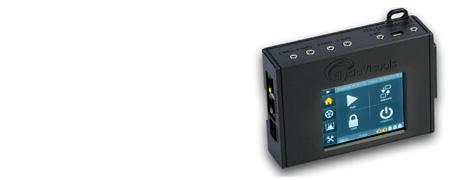
The 10pin connector, the PC-socket and the USB connection of my D700 are all connected to my timelapse controller. This makes it possible to have full control, but I can also measure actual exposure time by watching the PC-socket.
The video in this blog is the first that I made with my new device. The starting shutter speed was 500ms (half a second) with 100 ISO. The sequence ended with 2000ms and 400 ISO. Every shot had a 10ms longer exposure time compared to the previous one. I wanted to ramp until 1600 ISO, but I ran into a bug of a software library that I used in my controller. I hope to do a new test this week where I hope to reach 1600 ISO with 4 seconds of exposure time. The controller automatically creates XMP files per image that contain the difference between the desired (calculated) exposure time and the actual (measured) exposure time. The current setup is using a laptop and my controller. This will soon be replaces by a very, very small embedded device. The whole setup should easily fit into your pocket of camera bag.
I don't see any flickering of discrete exposure steps. That was the problem that many found when they used a Nikon camera for similar movies. For me this definitely proves that my technique is working. Note that my controller can be used with all camera brands, Nikon, Canon, Sony etc. This opens up the doors for other complex timelapse exposure techniques. I will write more about that on my blog when I have investigated this a little bit more.
There is no need to manually correct the images. Just put the images together with the XMP files into a folder. Import the folder into Lightroom and export the images as jpg of tiff files. You can then create your timelapse movie.
related products - Related Products
- Log in to post comments